
How to install and setup Tag Manager on CS-Cart online store
Elena TikhonovaDecember 29th, 2020
Google Tag Manager is an excellent tool for SEO and Internet marketing specialists. GTM (Google Tag Manager) has a huge amount of features and this service is absolutely free.
"Google Tag Manager is a free tool that allows you manage and deploy marketing tags(snippets of code or tracking pixels) on your website (or mobile app) without having to change the code."
The service makes it possible to use the marketing tags without exterior help. You can setup the necessary options without distructing the developers with the requests like "Create some code for me to see how many people click to this red button".
The GTM has a simple and a user-friendly interface. This web design was created for the Internet marketing specialists, not for the developers.
You can easily track how often the clients click to any button and see the results in Google Analytics report. As we work with the shopping cart platforms — CS-Cart most of the time, we will give examples on this CMS in this article.
How to install Tag Manager on CS-Cart website.
First of all you need an account in Google email. If you have already had Google account, go to the next step: create the Google Tag Manager account and click the button "Create account'.
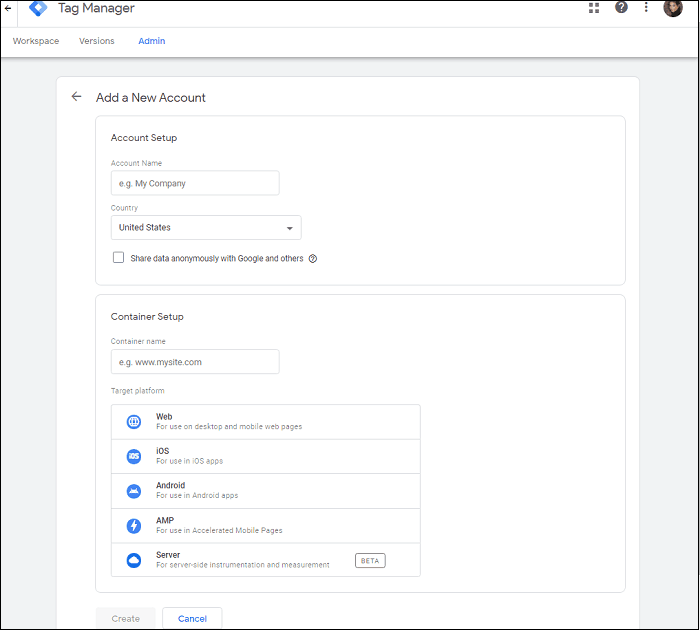
Fill in all fields with the relevant information, select the required options. Usually we use Tag Manager for the websites.
Once you have agreed to Google’s Terms of Service, the next step will be to install Google Tag Manager onto your target platform.
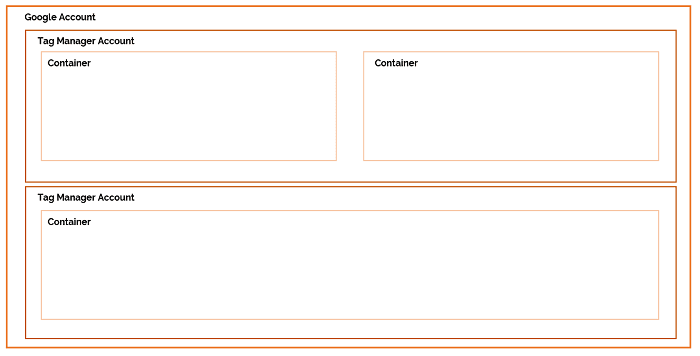
As you build the new account for the website you have to get some information about Google Tag Manager structure.
GTM has a special hierarchy. The account is on the top level of this hierarchy.
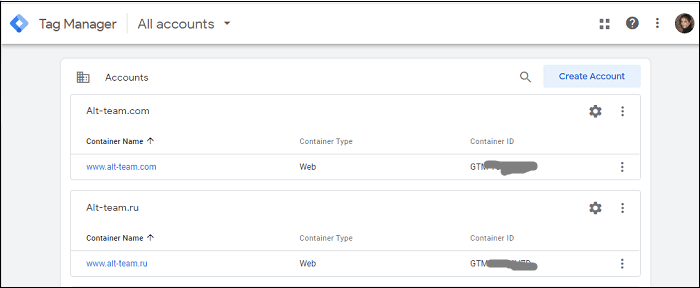
After the account is created, it appeared in the list of the websites in Google Tag Manager account. After you choose your website, you can move to the tag settings in this website account.
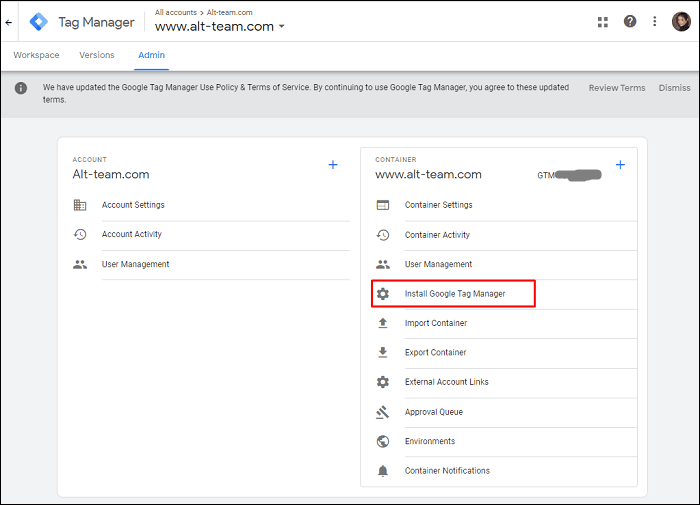
Open the account settings and find the line Install Google Tag Manager, click to this line.
GTM code with the installation guide is opened.
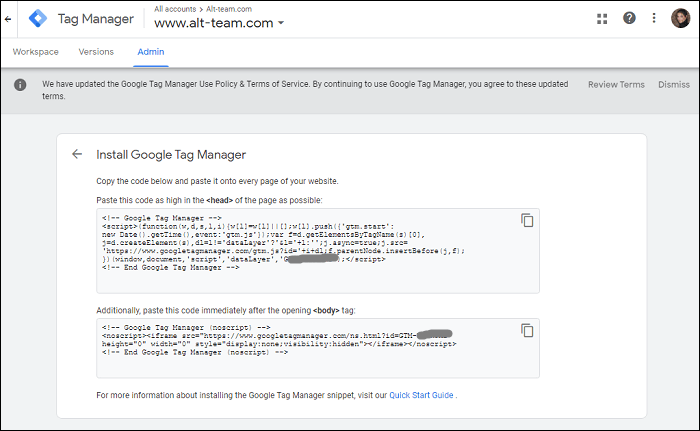
Following the instructions and install this code to your website, you can run the website tags with the help of GTM interface. But there is still no connection between the GTM account and Google Analytics account.
To associate the accounts and see the results of events in GA, you need to create a new tag and the variable for the Google Analytics tracking code.
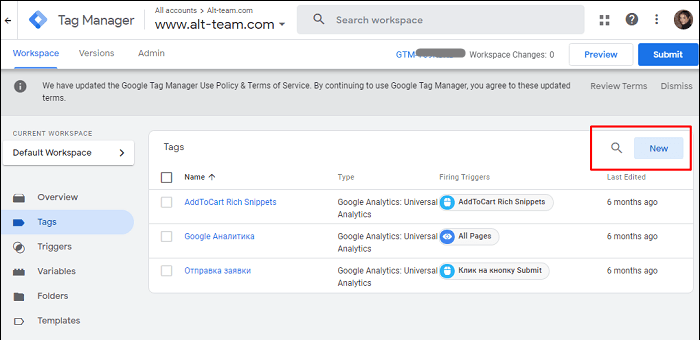
By default, the new tag is created with the name "Tag without the name". You can easily change the tag title. We named the new tag "GA tracking code".
We choose the Google Analytics in the tag settings: Universal Analytics.
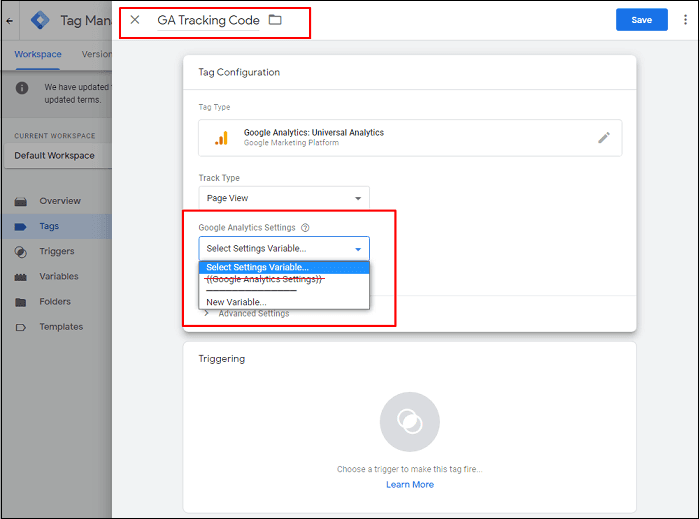
If you create the tracking code for the Google Analytics for the first time, there won't be any line {{Google Analytics Settings}}. We have already had this variable that's why we have it on the screen shot. But, you need to select New Variable if it's required this variable for the first time.
You give the variable name , enter the tracking code. This tracking code you take from the Google Analytics account . Then you save the variable.
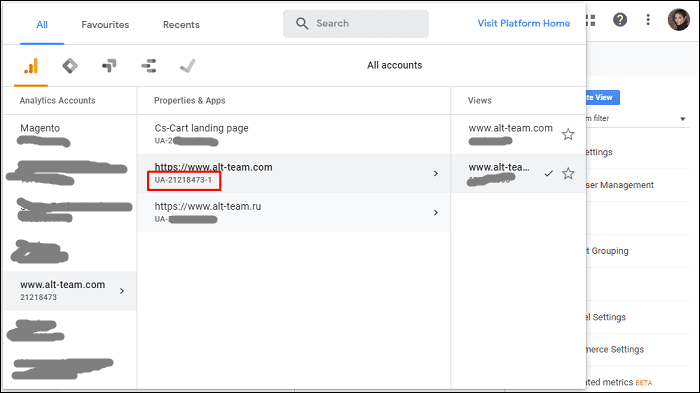
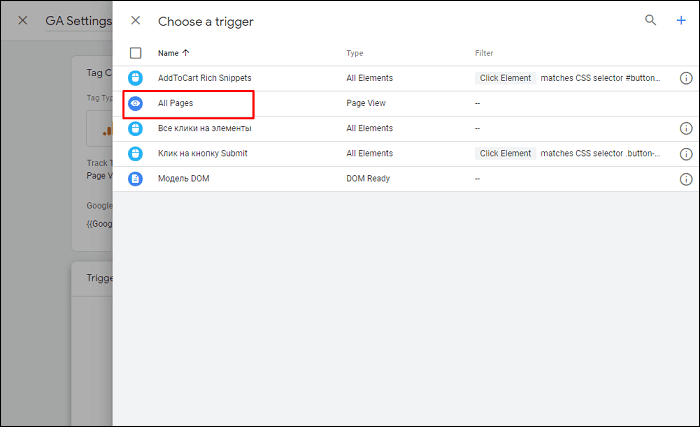
You should have the settings like on the screen shot.
To check if all settings are setup correctly , you have to click to the "Preview" and check the changes with the help of the Tag Assistance.
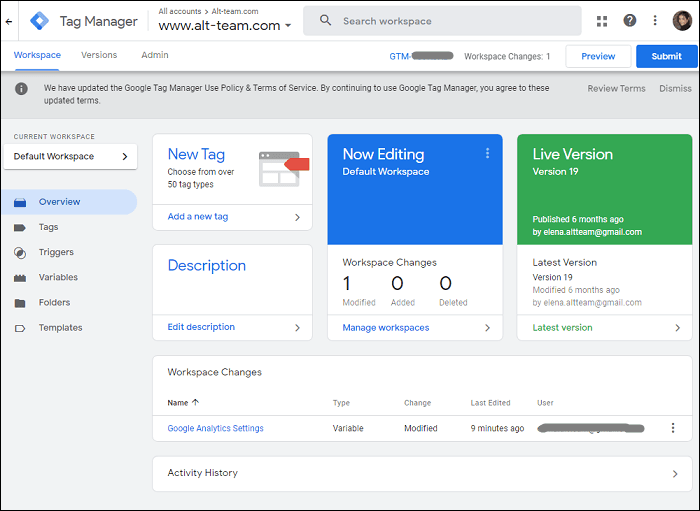
Don't forget to switch off all ad blockers. If you forget about it. the Tag Assistance can't connect with the website.
So, we set up tag that will tie the accounts in Google Tag Manager and Google Analytics.
Leave your comment
Your feedback is very important to us. Share your thoughts on what you read, or tell your own story.
Rating